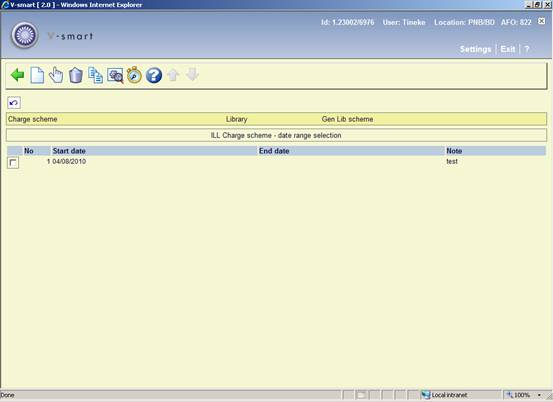
After selecting the option, an overview screen will be displayed:
: use this option to add a new charge scheme. See section 822.7.2.1 for details.
: select a line and then this option to view or modify the details. See section 822.7.2.2 for details.
: select a line and then this option to delete the rule. The system will prompt for confirmation.
: select a line and then this option to create a new charge scheme based on information in the selected record.
: This option shows the general definition. See above, only Name and Description can be changed for an existing code.
: Use this option to test the definition. See section 822.7.2.3.
: use this option to add a new charge scheme. The system first prompts for a Start date of applicability, defaulting to “today”:

After clicking on this form, a summary screen will be displayed:
See below for an explanation of this screen.
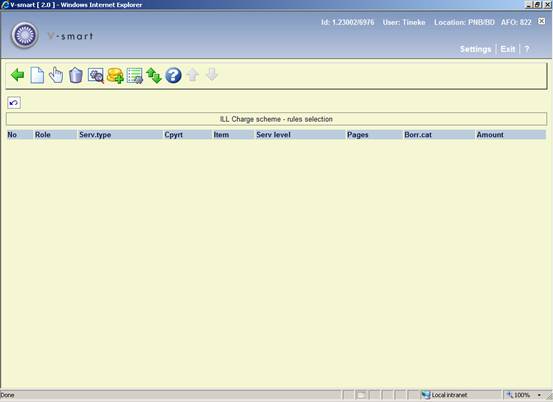
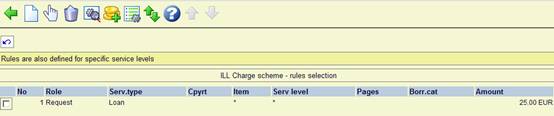
After selecting an existing rule period and the option an overview screen will be displayed:
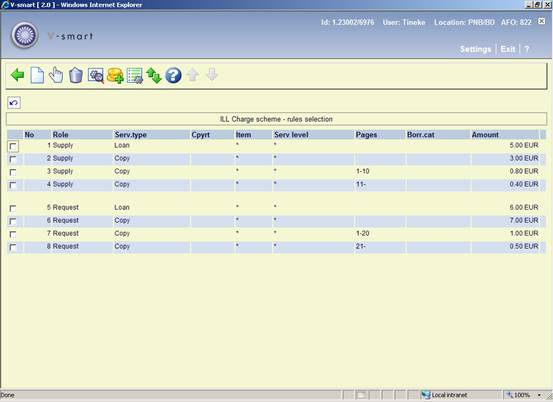
First of all, the display is separated into the four main constituent parts - so we have
· Supply the charges to be made for lending the item to another library
· Request the charges to be made to the library for borrowing an item
· Budget the charges to be made when a budget account is used
· Borrower the charges to be made to an individual borrower
: Use this option to add a new rule. An input form will be displayed, see below for an explanation.
: Select a line and then this option to view/modify the details of a rule. An input form will be displayed, see below for an explanation.
: Select a line and then this option to delete the rule. The system will prompt for confirmation.
: After selecting this option the form with Start date will be displayed (see above).
: This option allows for two additional fields to be specified for this scheme. See below for an explanation.
: This option allows ADDITIONAL charges to be added to the charge calculated as described above. See below for an explanation.
: This option allows rules to be moved up and down. You can not move a rule to a different role section.
After selecting the or option, an input form will be displayed:
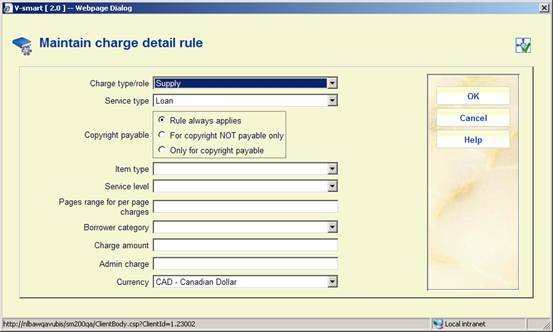
Charge type / role: This tells the system the type of charge that is being calculated i.e. the settings that come with this tell us how to calculate the charge.
· Supply is the charge we make on a requesting library to supply the item
· Request is the charge expected from the supplying library
· Borrower is the charge passed on to an individual borrower
· Budget is the charge passed on when this comes from a department budget
· Borrower over quota applies when “quotas” have been turned on. If the individual borrower has used more than their regular quota, then different charges may apply.
· Lending this may be used when the charges to the library are passed on in full to either the budget account or individual borrower. This saves 3 separate but identical settings having to be entered.
Service Type: The standard service type selection. This is optional if the library doesn't vary its charges for the specific role according to service type OR the charges for service levels are treated as additional charges.
Copyright payable: Select the required setting for this rule.
Item type: Optionally select a specific item type to which this rule applies.
Service level: Optionally select a specific service level to which this rule applies.
Pages range for per pages charges: You can specify a page range for additional charges. E.g. the cost for pages 1-10 is XX and then for each page from 11 upwards YY.
The “per page” charge is always an additional amount, implied by the Page range field being set.
Borrower category: Optionally select a specific borrower category to which this rule applies.
Charge amount: This is the actual amount to charge.
Admin Charge: When applying charges to a borrower or budget, the question arises as to exactly WHEN the charge is payable. Should it be charged (and become payable) when the request is placed. But, then it may be that the library cannot find the item from its usual suppliers, and has to do an expensive extended search at, say, the British Library. Some libraries have a policy of charging borrowers regardless of whether the request is supplied or not.
The Admin charge may be added to the charge scheme as a fixed amount, payable immediately the request is placed. It is therefore conceived of as an “administrative fee” rather than as a charge for the request; libraries are of course able to decide whether or not to use this feature.
This charge becomes payable when the request is entered into the system – either by the borrower from the WebOpac or by staff. At this point, of course, a supplier may not have been selected, so the charge scheme used would be the default scheme – and in theory this admin charge is probably NOT related to a specific supplier. (And is therefore not quite a general part of the charge scheme structure).
However, in order to keep the rules in a single “place”, the Admin fee is tied in with the other charging rules i.e. within the charge scheme mechanism.
For some libraries, especially publics, it may be that only the Admin fee is defined i.e. they define pretty much a fixed amount for loans, regardless of other considerations.
In the summary listing of the rules, if an Admin charge is defined for the rule, then this appears as / 2.00 following the charge amount.
The Admin charge ONLY applies to charges to borrowers or budgets i.e. for outgoing requests only.
Currency: It can be seen that a currency code can be assigned to the rules - for example, the charges made by a supplying library can be entered in their local currency. This is also true for charges that the library makes for supplying items to them. It should be noted that all the individual elements making up the charge must be in the same currency!
However for charges to borrower or budget, these must be in the local currency of the system
Note on the “Lending” Charge type / role
Many libraries choose not to pass on the full cost of a loan to the borrower or to a departmental budget (if only to make it easier to explain the charging to the borrower); hence the features of the system to allow a distinction to be made between the charge to borrower, to a budget and the actual cost to the library.
If the full calculated cost IS to be passed on, then the “Lending” charge type can be used, to save having to enter the three different categories of charging. There is, however, one limitation - since the charge amount for borrowers is in the local currency of the system, then necessarily the currency for the library charge must also be assumed to be in the local currency. The system will ensure that the currency entered IS the local currency, if the “Lending” charge type is used.
: This option allows for two additional fields to be specified for this scheme. An input form will be displayed:

Late return or lost fee: Charge made to the library on late return or if lost.
Refund: Refund made if a lost item returned.
These are a mechanism for storing such charges incurred by the library.
: This option allows ADDITIONAL charges to be added to the charge calculated as described above. This brings up a listing show all the defined standard service levels e.g.:

For any or all of these search levels, additional charges may be added by selecting the relevant line.
This brings up an input grid and workflow as for entering the main charges. In practice, the rules entered at this level would normally be very simple e.g. just a simple setting for Loans and Copies only.
(Note – although service level is offered on this subsequent screen, then this is redundant since we are defining the charges for a specified service level. This will be always set to the service level being used and protected).
In other words, it is expected that the extra charges are rather simply defined; however if the library really wish to charge normal users an extra 2.00 for a rush request, but EXTERNAL readers 3.40 for such a request, then they can!
If such charges are defined, this will be displayed in the header of the Rules screen:
After selecting the option an input form will be displayed:

This allows you to enter specific permutations for which to test the calculation e.g. a loan made payable on 25th May 2010 for an Adult borrower, for a monographic item, and so on.
After clicking , the result of entering these details is shown:

This is a screen with a tab for each type of charge calculation i.e. showing the charge to Supply such an item, the expected charge on the library, the charge that will be made to the borrower and finally the charge that would be made if charged to a budget.
Charges for outgoing interlibrary loan requests may be charged to departmental budgets rather than being made payable by the individual requesting.
Whether a request is payable by the borrower or charged to a budget is set on an individual request or may be presented as an option in the WebOpac when the borrower is placing their own request.
This section describes how budgets are maintained and used within the system. In the following “department” refers to an organisational department (within university or company). When the ILL department is referred to, the full “ILL department” will be written.
Budgets are defined for the circulation metainstitution and may therefore be shared by multiple ILL departments.
After selecting this option, a summary screen will be displayed:
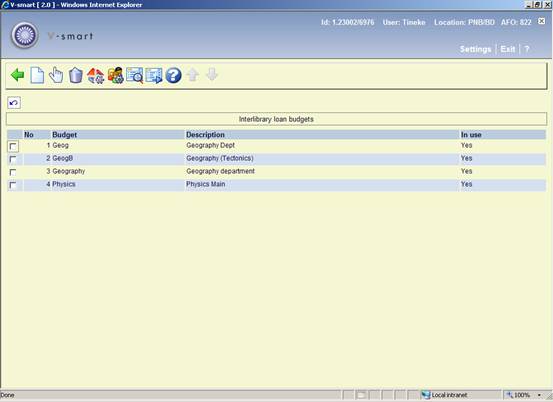
: Choose this option to define a new budget. See section 822.8.1.
: Select a code and then this option to modify the general properties of the budget. See section 822.8.1.
: Select a code and then this option to delete the code. The system will prompt for confirmation.
: The department setup allows individual budgets to be linked to a department, as defined in AFO 482. See section 822.8.2.
: It is possible to configure the WebOpac to allow borrowers to select a budget code against which the charge should be made. See section 822.8.3.
: Takes the user to the invoice display screens. See section 822.8.4.
: Takes the user to the invoice processing screens. See section 822.8.5.
After selecting the or option, an input form will be displayed:

Budget code: A unique code to identify the budget.
Budget description: A brief description of the budget.
Budget in use: Whether or not the budget is in use.
Invoice main document: Enter the name of the main mailmerge document that defines the layout of the invoice associated with this budget. Thus for the “single” invoice case, the layout would be very different from a regular invoice to a library. (See also the general help on mailmerge).
Name and Address for invoicing: are optional fields and are available as fields to be printed on an invoice (as BillingName and BillingAddress fields)
Email address and Use email for invoicing: allow you to send the invoice by email.
: The department setup allows individual budgets to be linked to a department, as defined in AFO 482 – Borrower Authority Lists – Department.
After selecting this option a dropdown list with all departments is displayed:

After clicking the following form will be displayed:

ILL Budgets, ILL Budget prefixes: This defines which budgets comprise the department. These may be defined individually using the first input field, or by simply assigning a prefix. The prefix must end in *.
Invoice main document: Enter the name of the main mailmerge document that defines the layout of the invoice associated with this department. Thus for the “single” invoice case, the layout would be very different from a regular invoice to a library. (See also the general help on mailmerge).
Name and Address for invoicing: are optional fields and are available as fields to be printed on an invoice (as BillingName and BillingAddress fields)
Email address and Use email for invoicing: allow you to send the invoice by email.
No limits are placed on which codes are linked to which department – a specific budget code MAY be valid for several departments.
In addition, this setting enables the system to determine which budgets to offer when adding budget codes to a borrower record.
: It is possible to configure the WebOpac to allow borrowers to select a budget code against which the charge should be made. Assuming this option in the WebOpac is in use, then it may be valid only for certain borrower categories.
After choosing this option a selection form is displayed:

Indicate whether this is allowed for each borrower category.
· In case there are more than 15 borrower categories, there will be a button to go to the next screen.
· The button allows you to go directly to a specific borrower category.
: Select a budget and then this option, a summary screen will be displayed:
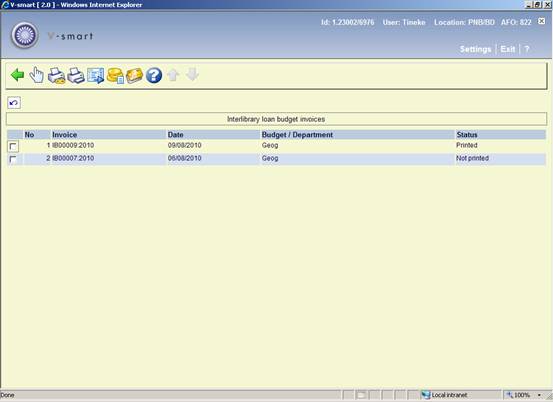
: Select a line and then this option to display the requests associated with the invoice. See section 822.8.4.1.
: Use this option to print all invoices as yet unprinted. The standard screen for generating mailmerged output will be presented. (See also the general help on mailmerge).
: Select a line and then this option to print the invoice. The standard screen for generating mailmerged output will be presented. (See also the general help on mailmerge).
: job is a standard “batch task” in Vubis – it may be run online, in batch or as a regularly scheduled task in “memory”. See section 822.8.4.2.
: Select a line and then this option to pay the invoice. See section 822.8.4.3.
: This option is not yet implemented.
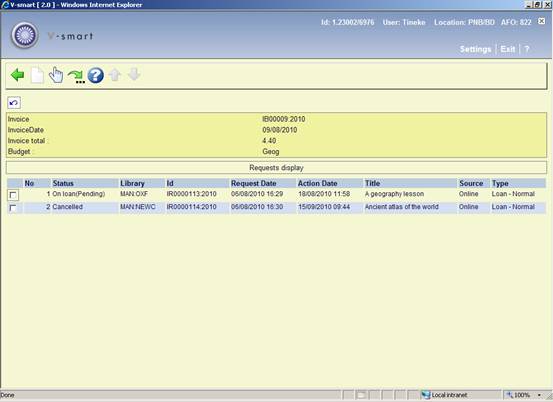
: Select a line and then this option to display the requests associated with the invoice.
: This option is not valid here.
: Select a line and then this option to display the details of the request. See the help of AFO 821 for an explanation of this functionality.
: This option allows the user to search for a specific set of requests. After choosing this option, a selection form is displayed:

Select the required criterion and click , the system takes you the screen nearest to the searched for request.
: job is a standard “batch task” in Vubis – it may be run online, in batch or as a regularly scheduled task in “memory”. When you choose this option, the standard screen for scheduling jobs will be displayed.
Note
For each ILL department on the system, the process will select all requests for which the payment is to be made to a budget account, which is ready for payment (i.e. payable) and obviously previously not invoiced.
The selection run will process requests up to but NOT including those entered “today” – to ensure that the “boundaries” of the invoice are clear - that is, for a given day, requests will not be invoiced across multiple invoices (for one budget).
Separate invoices are then generated for each budget, totalling the individual requests for that budget code, or are aggregated according to the “Group by department” setting.
: Select a line and then this option to pay the invoice. An input form will be displayed to allow a record of the payment to be recorded against the invoice

If the invoice has already been marked as paid, the previously entered details are redisplayed and may be amended.
: Takes the user to the invoice processing screen. The difference with the above option is that a listing is shown of invoices for all budgets.
The options are the same as described above for invoices of an individual budget.

In this section you can define various languages. These settings may be assigned to a library, and may then be used to allocate wording on the output notices appropriate to this language code. Thus for example, it is possible to define, say, overdue notices in Japanese which would then be printed for libraries with that language code set.
After selecting this option, a summary screen will be displayed:

: Choose this option to define a new language. See section 822.9.1.
: Select a code and then this option to view / modify the details of the code. See section 822.9.1.
: Select a code and then this option to delete the code. The system will prompt for confirmation.
After selecting the or option, an input form will be displayed:
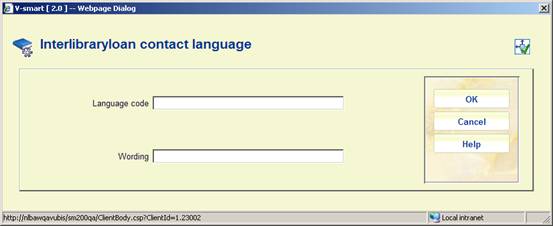
Enter a unique Language code and a Wording.
The interlibrary loan module provides support for the document delivery function. This process sits somewhere between the management of incoming requests and outgoing requests. For document delivery we are concerned with the supply of library material externally to library users – typically corporate organizations e.g. when the library supplies material to, say, a law firm.
This is often managed by an interlibrary loan department, and so falls into the general management functions of interlibrary loan.
After choosing this menu option, a selection form will be displayed:
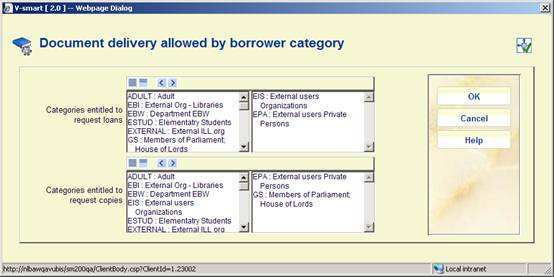
From this screen it is possible to tell the system which borrower categories may enter requests for loans in this way and/or for copies in this way.
It is possible to link the receipt or supply of an electronic copy to the actual location on (say) a network of the copy (e.g. where the .pdf resides). In order to allow these to be retrieved by a user from the WebOpac, these must be presented as a URL. This setting allows you to link a physical location to a Webserver address.
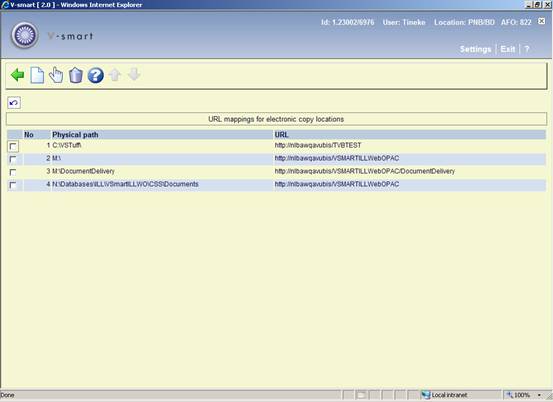
After selecting this option, a summary screen will be displayed:
: Choose this option to define a new path. See section 822.11.1.
: Select a code and then this option to view / modify the details of the path. See section 822.11.1.
: Select a code and then this option to delete the code. The system will prompt for confirmation.
After selecting the or option, an input form will be displayed:

Full path for copy location: Enter the full path for the physical location of files.
Full URL for copy location: Enter the URL for the virtual directory.
In the above example, files physically located at “M:\DocumentDelivery” are defined in the virtual directory “http://nlbawqavubis/VSMARTILLWebOPAC/DocumentDelivery”
If this mapping is found, then such a copy will be offered for online display from the WebOpac.
· Document control - Change History
|
Version |
Date |
Change description |
Author |
|
1.0 |
October 2010 |
new AFO |
|